


HouseCAD - Introduction guide
In this brief introduction guide, we will explain how to create a simple building with HouseCAD.
When HouseCAD is started, you can see the following graphical interface:
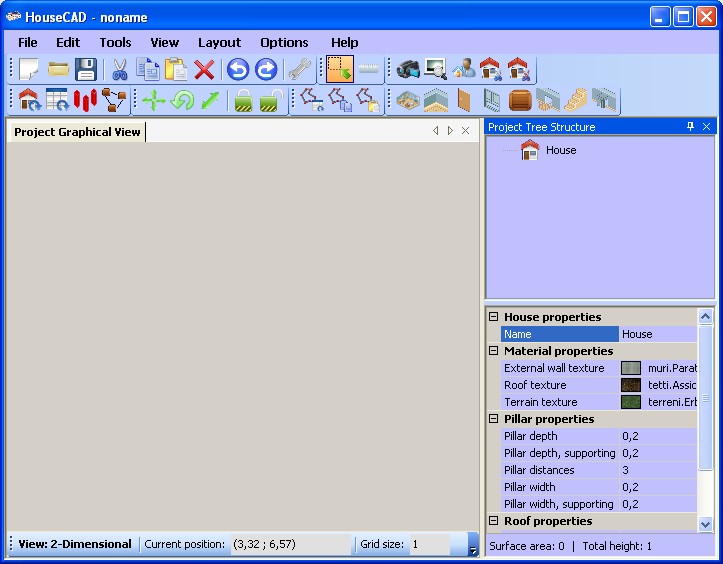
To the left, a panel shows the house structure in one of the three available views: 2-Dimensional, 3-Dimensional and assonometric. By default, the 2-Dimensional view is enabled.
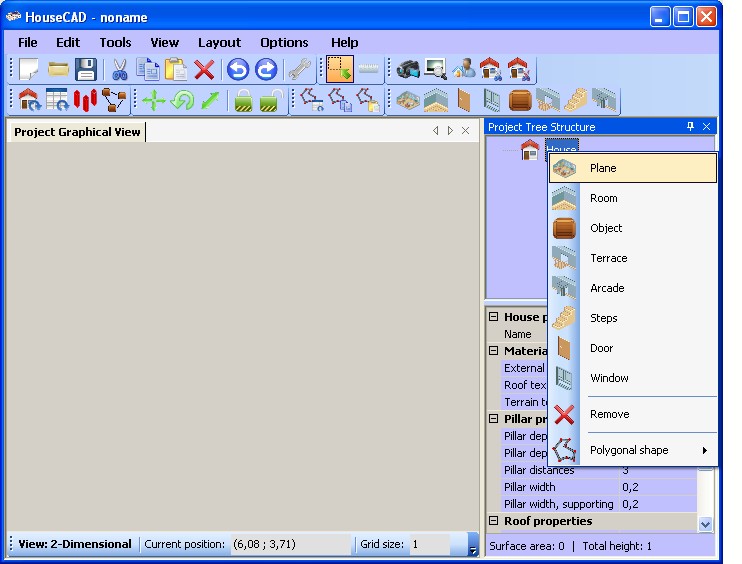
To the right, a panel shows the hierarchical structure of the building. The root node of the tree represents the entire building to generate. With this panel, you can create the entire building, starting from its descriptive parameters. So, to create a building, you have to add one or more floors with the right-mouse button on the panel and select the menu item 'Floor':
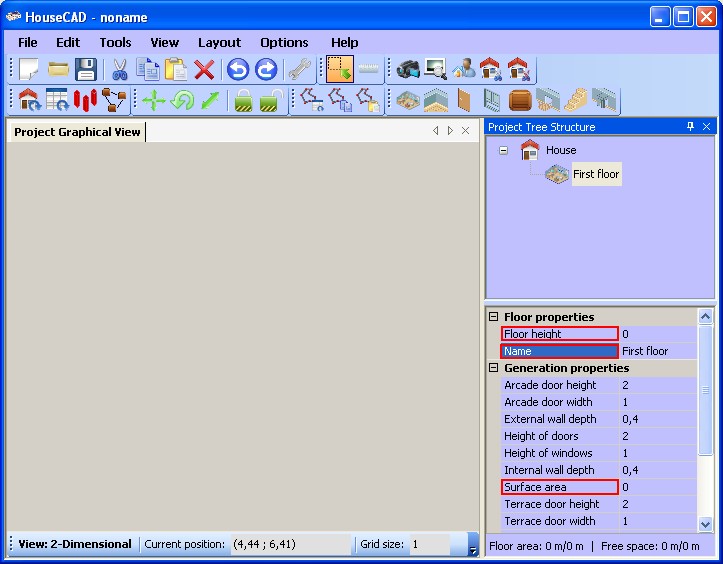
The created floor is initially empty; this means that we have to establish its the name, the surface area and the height too, respectively in squared metres and metres:
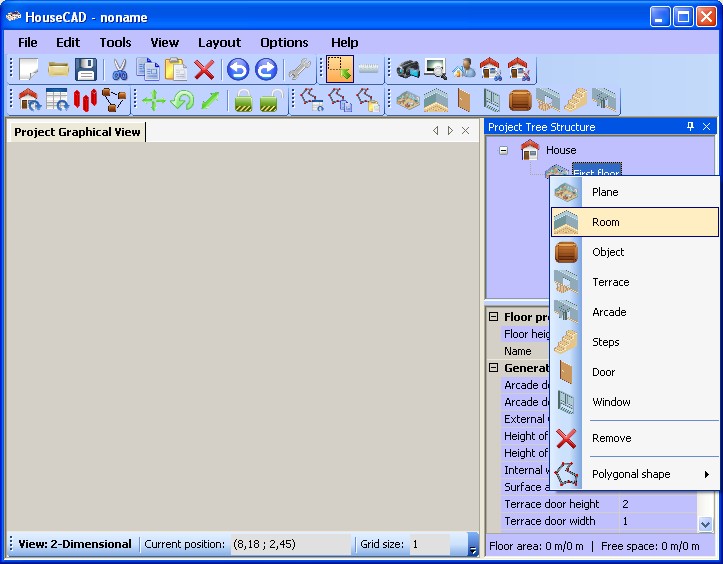
Next, you have to insert the rooms inside the created floor. With the same procedure shown previously, select a floor, and with the right-mouse button, select the menu item 'Room':
For example, you can create 3 rooms: Entrance, Main room and Bathroom. For each created room, you have to define the parameters 'Name', 'Room Category', 'Surface Area' and 'Neighbor room name':
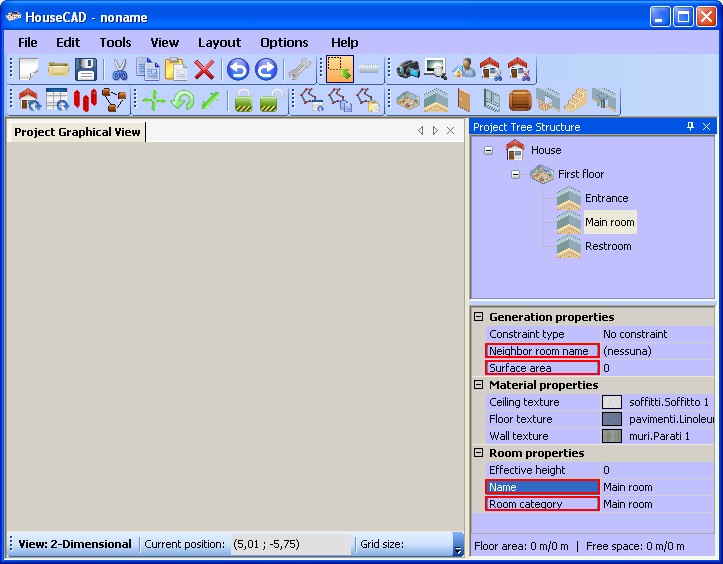
The 'Room Category' parameter will be used to establish the type of furnishings inside the room itself (for example, if it's a restroom, then the category is 'Bathroom', and this means that inside the room there will be the sanitary fittings, and so on), while the 'Neighbor room name' parameter will be used to establish the link with other rooms. In this way, a building will be created, starting from measures, specified with the 'Surface Area' parameter, and from neighboring constraints between rooms, specified with the 'Neighbor room name' parameter.
In the following example, we suppose to create 3 rooms with the following descriptive parameters:
- Entrance: Area=5 mq, Neighbor room=Main room, Category=Entrance
- Main room: Area=15 mq, Neighbor room=Restroom, Category=Main room
- Restroom: Area=8 mq, Neighbor room=None, Category=Restroom
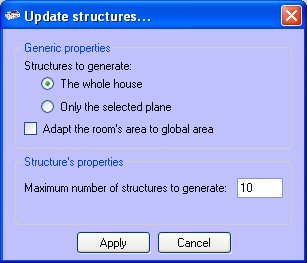
In this window, both the part of the building to generate (one floor or all the floors) and the maximum number of prospectus can be specified. By clicking on 'Apply', HouseCAD will compute the various prospectus, following the surface areas and the neighboring constraints specified previously. Finally, the output will be computed as in the following window:

In this window, the computed prospects can be selected and, for each prospectus, the relative 2-Dimensional or 3-Dimensional view will be shown, with the homonym tools in the upper panel. By selecting a prospect, and clicking on 'Apply', the current project will be updated with the selected structure, and with the tree structure panel, you can select and see the various generated entities.